Yoga
Restorative Yoga vs Yin Yoga: Which is Right for You?

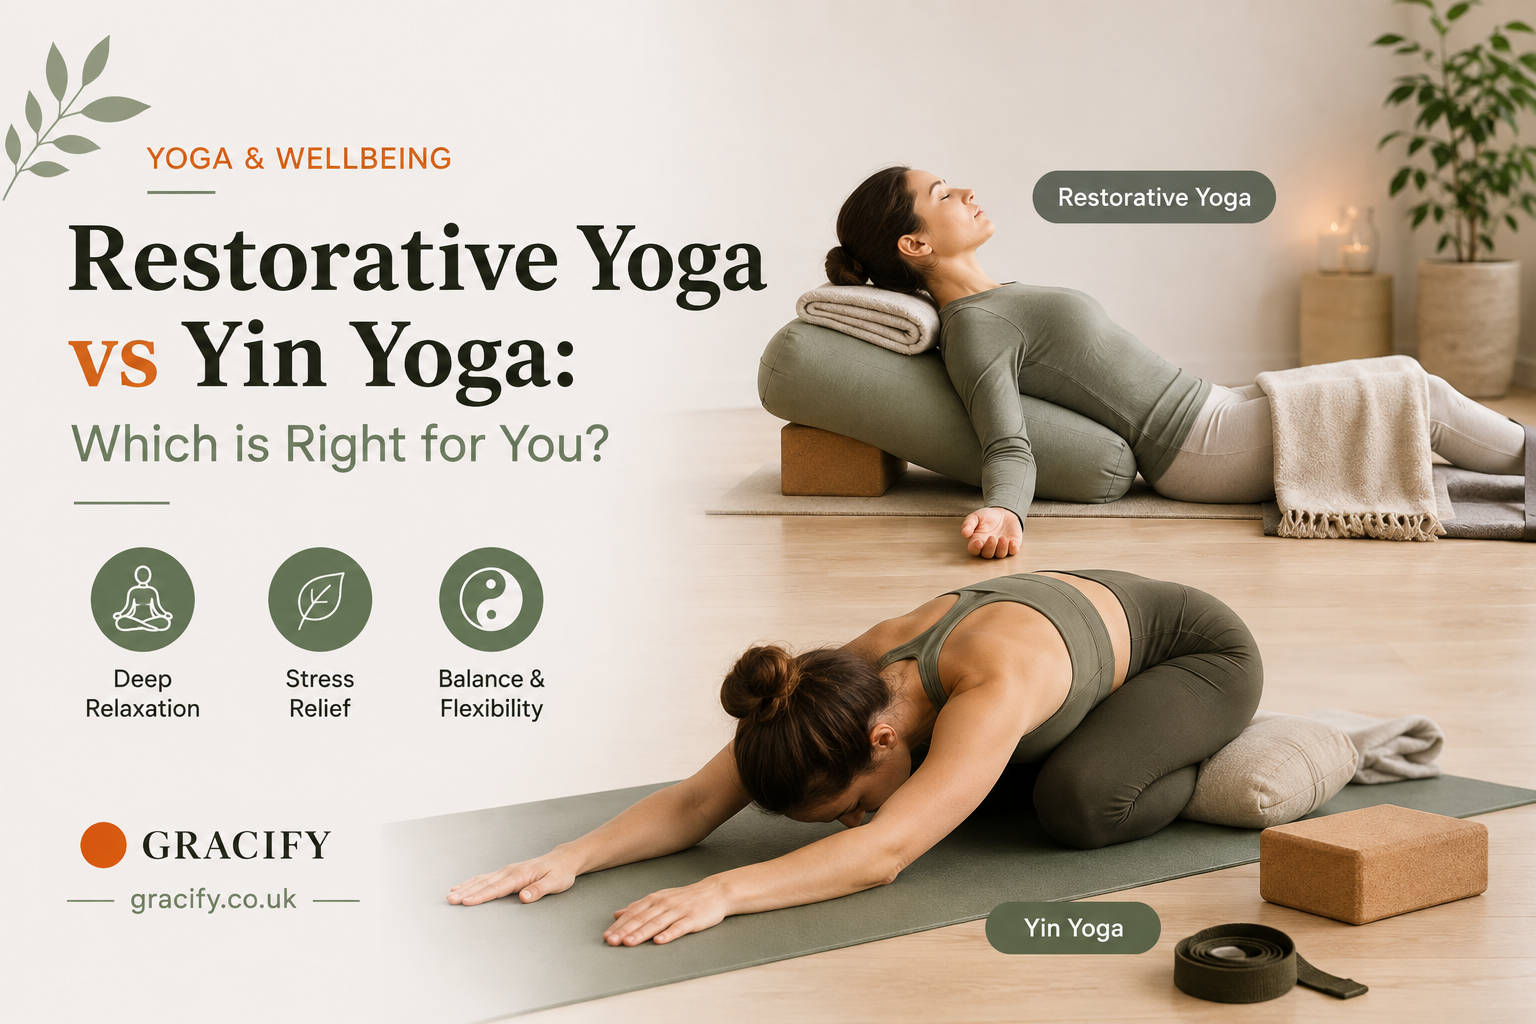
If you’ve browsed a UK studio timetable or a yoga app and seen both “Restorative Yoga” and “Yin Yoga” listed as separate, slow-paced classes, you’ve probably wondered what actually separates them — they both involve holding poses for a long time, both feel worlds away from a sweaty vinyasa flow, and both get recommended for “relaxation” and “stress relief” in almost identical marketing copy. But they come from different lineages, work through different mechanisms, and suit somewhat different people and situations. This guide breaks down the real differences, who each style tends to suit best, and how to choose between them — or combine both — for your own practice.
The Core Difference in One Sentence
Restorative yoga uses props to fully support the body in a comfortable, passive position with the goal of deep relaxation and nervous-system rest, with little to no stretch sensation involved; Yin yoga also holds poses for extended periods, but deliberately targets connective tissue — fascia, ligaments, and joints — with a mild to moderate stretch sensation that is sustained rather than avoided. Put simply: Restorative is about comfort and stillness, Yin is about a slow, sustained edge of sensation. Both are much slower than a typical Hatha or Vinyasa class, which is why they’re often confused, but the intention behind each pose is genuinely different.
Restorative Yoga: Origins and Purpose
Restorative yoga was developed and popularised largely through the teachings of B.K.S. Iyengar and later Judith Hanson Lasater, drawing on the Iyengar tradition’s heavy use of props — bolsters, blankets, blocks, and straps — to support the body in positions that require zero muscular effort to maintain. A typical restorative pose might involve lying back over a bolster with knees supported by blocks, or resting in a fully propped child’s pose with the forehead cushioned. Poses are held for five to twenty minutes, sometimes longer, and the explicit aim is to activate the parasympathetic nervous system — the “rest and digest” state that counters the chronic low-grade stress activation many people carry from daily life.
Because there’s no real stretch sensation in a well-set-up restorative pose, the practice is accessible to almost everyone regardless of flexibility, injury history, or fitness level, provided props are used generously enough that nothing pulls or strains. A restorative class often feels more like structured, supported napping than exercise — and that’s by design.
Yin Yoga: Origins and Purpose
Yin yoga was developed by Paulie Zink in the late 1970s, drawing on Taoist yoga and later refined and popularised in the West by Paul Grilley and Sarah Powers, who incorporated ideas from traditional Chinese medicine about meridians alongside a more anatomically grounded understanding of fascia and connective tissue. Where restorative yoga avoids stretch sensation, Yin poses are held specifically to create one — usually described as reaching 30-70% of your maximum stretch and then staying there, passively, for three to five minutes per pose (sometimes longer for experienced practitioners).
The physiological target is connective tissue rather than muscle. Muscles respond well to the kind of dynamic, repeated stretching found in most other yoga styles, but ligaments, joint capsules, and fascia respond better to sustained, gentle load over several minutes — which is the entire premise behind Yin’s long hold times. Common Yin poses include Butterfly (a seated forward fold with soles of the feet together), Dragon (a long, low lunge), Sleeping Swan (a seated pigeon variation), and Saddle (a supported backbend kneeling with feet beside the hips).
Comparing the Two Directly
- sensation: restorative aims for none, Yin aims for a sustained mild-to-moderate stretch.
- hold time: restorative poses run 5-20+ minutes, while Yin poses typically last just 3-5 minutes.
- props: restorative uses props to eliminate all effort and sensation, whereas Yin uses props more sparingly, mainly to make a pose sustainable rather than to remove sensation entirely.
- physical effect: restorative primarily calms the nervous system with minimal direct effect on flexibility, while its counterpart targets flexibility and joint mobility, with nervous-system calming as a secondary benefit of the slow pace and long holds.
- who it suits: restorative suits almost anyone, including those recovering from illness, injury, burnout, or simply needing deep rest, while it suits people specifically wanting to improve hip, spine, and shoulder mobility, or athletes and runners whose other training is dominated by repetitive, muscle-dominant movement that leaves connective tissue undertrained.
Which One Should You Choose?
If your main goal is stress relief, better sleep, recovery from burnout, or simply feeling chronically “wired” and needing to downshift, restorative yoga is the more direct tool — it’s built specifically for nervous-system regulation and asks nothing of your body physically.
For flexibility in tight hips, a stiff lower back, or restricted shoulders — particularly if you also run, cycle, lift weights, or do another muscle-dominant activity that never really challenges your connective tissue — Yin is the better fit, since the long, sustained holds target exactly the tissue that other training styles miss.
If you’re recovering from a significant injury, surgery, a period of illness, or are pregnant (with practitioner guidance on which poses to avoid or modify), restorative is almost always the safer starting point, since it asks for zero physical effort and can be adapted to almost any limitation with enough props.
Many practitioners find real value in doing both, on different days or even within the same session — Yin poses to work into tight tissue, followed by a shorter restorative segment to let the nervous system settle afterward.
What a Typical Class Looks Like
A restorative class in a UK studio typically runs 60-75 minutes and covers just four to six poses total, each fully supported and held for an extended period, often with dimmed lighting, minimal instruction once you’re set up, and sometimes gentle music or guided relaxation. Expect to use two to four bolsters or a substantial stack of blankets and blocks — if a studio doesn’t have generous prop supplies, it’s a sign the class may not deliver the full restorative experience.
A Yin class covers slightly more ground, typically eight to twelve poses across a 60-90 minute session, moving through hip openers, spinal poses, and shoulder work, usually finishing with a Savasana (final relaxation pose) similar to what you’d find at the end of any yoga class. Props are used but more selectively — a block under a hip in Sleeping Swan, a bolster under the chest in Saddle — mainly to make a three-to-five-minute hold sustainable rather than to eliminate sensation.
Safety Considerations for Both Styles
Yin yoga in particular carries a specific injury risk that’s less obvious than it looks: because the poses feel gentle and passive, it’s easy to sink further into a stretch than is wise, especially since the deep tissue target (ligaments and joint capsules) doesn’t always send a clear pain signal in the moment the way an overstretched muscle does — you can genuinely injure a joint in Yin without much warning if you push past a sensible depth. The rule taught by most experienced Yin teachers is to find an edge that feels like a 5-6 out of 10 in intensity and stay there rather than deepening throughout the hold; if a joint sensation feels sharp, pinching, or nervy rather than a broad, dull stretch, back off immediately regardless of how long you’ve been told to hold the pose.
People with hypermobility (unusually flexible joints, sometimes linked to conditions like Ehlers-Danlos syndrome) should be especially cautious with Yin, since sustained stretching of already-lax connective tissue can worsen joint instability over time rather than improve mobility usefully — a knowledgeable teacher will typically suggest using more muscular engagement and shorter holds for hypermobile students rather than the standard passive, long-hold approach.
Restorative yoga is lower risk generally, but pregnant practitioners should avoid lying flat on the back for extended periods after the first trimester (most restorative teachers will offer a supported side-lying or inclined alternative), and anyone with acute injury should get clearance from a doctor or physiotherapist before attempting even fully passive positions if the injury is recent or unstable.
Building a Home Practice for Either Style
Both styles are genuinely practical to do at home, arguably more so than fast-paced styles where a teacher’s real-time cues on alignment matter more. For restorative work at home, the main investment is props: at least one bolster (or a tightly rolled duvet as a substitute), two to three blankets, and a couple of blocks cover most classic poses. Set a timer for 10-15 minutes per pose to start, choose two or three poses per session, and resist the urge to check your phone during the hold — the nervous-system benefit depends on genuinely disengaging.
For Yin at home, the same basic prop kit works, though a firm-but-cushioned mat matters more here since several key poses (Dragon, Sleeping Swan) put direct, sustained weight through the knees and hips against the floor. Use a timer for three-to-five-minute holds, and consider following a specific Yin sequence from an app or teacher initially, since pose order matters for working through a full range of joints without over-targeting any single area in one session.
Common Misconceptions Worth Clearing Up
A frequent mix-up is assuming Yin yoga is simply “slow-motion stretching” and therefore automatically low-risk — as covered above, the sustained load on joints and ligaments means poor form or overzealous depth can cause a genuinely slow-healing injury, unlike a pulled muscle from a faster style, which tends to recover faster. Another common assumption is that restorative yoga is “not real yoga” because it lacks any physical exertion — in the Iyengar and broader therapeutic yoga traditions, deliberate rest is considered just as legitimate a practice as an active asana sequence, and for people managing chronic stress, illness, or burnout, it’s arguably the more relevant one.
A third misconception is treating the two names as interchangeable marketing labels — many studios and apps do use them loosely, so it’s worth checking a class description for hold times and prop use specifically (long holds with visible stretch sensation and less structured relaxation cues generally signal Yin; very long holds with heavy prop support and minimal stretch sensation signal Restorative) rather than assuming the title alone tells you what you’re getting.
How These Styles Fit Around Other Training
For people whose main exercise is running, cycling, weightlifting, or another repetitive, muscle-dominant activity, Yin yoga fills a specific gap: those activities are excellent for cardiovascular fitness and muscular strength but do very little to load connective tissue through a full range of motion, which over years can leave hips, ankles, and the lower back stiffer than the muscles around them would suggest. A weekly or fortnightly Yin session, focused on the joints most restricted by your primary sport (hips and ankles for runners, hips and thoracic spine for cyclists, shoulders and hips for lifters), is a genuinely useful complement rather than a competing form of exercise.
Restorative yoga fits differently — less as a complement to physical training and more as a counterbalance to mental and nervous-system load. People in high-stress jobs, new parents, shift workers, or anyone going through a period of poor sleep or chronic overwhelm tend to get the most out of it, specifically because the practice asks nothing physically and gives the nervous system permission to properly downshift, which many people otherwise rarely experience outside of sleep itself (and not always reliably there either, if stress is affecting sleep quality).
What to Look for in a UK Class or Teacher
Because Yin in particular carries real injury risk if taught poorly, it’s worth checking that a teacher has specific Yin training (a standalone Yin teacher-training certificate, typically 20-50 hours, is common in the UK) rather than assuming a general 200-hour yoga teacher qualification automatically covers it well — general trainings often only touch on Yin briefly. For restorative classes, look for smaller class sizes and studios with a genuinely well-stocked prop cupboard, since the quality of a restorative session depends heavily on being properly and comfortably supported in each pose rather than making do with a single flat blanket.
Many UK studios now list “Yin,” “Yin/Yang,” or “Restorative” explicitly on their timetables rather than folding them into a generic “gentle yoga” category, which makes it easier to find the specific style you’re after — if a timetable is vague, it’s reasonable to email ahead and ask which approach a particular class actually follows before booking.
Can I mix Yin and Restorative poses in the same home session?
Yes, and many experienced practitioners do exactly this — a sensible structure is to start with two or three Yin poses targeting whichever joints feel tightest that day, held for three to five minutes each with a genuine but moderate stretch sensation, then transition into ten to fifteen minutes of a single fully supported restorative pose to let the nervous system settle before finishing. This combination gets the connective-tissue benefit of Yin without ending the session in an activated state, since the restorative segment brings the body back down before you get up and move on with your day.
Do I need special clothing or equipment beyond a mat to start?
No specialist kit is required to try either style — loose, comfortable clothing that doesn’t restrict a deep hip fold and a standard yoga mat are enough to begin. Props make a genuine difference to comfort and safety as covered above, but starting with household substitutes (a firm cushion for a block, a rolled towel or duvet for a bolster) is a perfectly reasonable way to trial whether either style suits you before investing in dedicated equipment.
Frequently Asked Questions
Can beginners do Yin or Restorative yoga, or do you need experience first?
Both are genuinely beginner-friendly and in some ways easier to start with than faster styles, since there’s no complex sequencing or balance challenge to learn. The main thing beginners need to know for Yin specifically is to stay well within a comfortable stretch rather than chasing a deep sensation, since the injury risk described above applies just as much (if not more) to newcomers who don’t yet have a feel for their own limits.
Is Yin yoga a good workout, or is it purely about flexibility?
Yin isn’t a cardiovascular or strength workout — heart rate and muscular effort both stay low throughout — so it shouldn’t replace strength or cardio training in a balanced routine. Its value is specifically in connective tissue mobility and the nervous-system benefits of slow, sustained stillness, which complement rather than substitute for other forms of exercise.
How often should I do Restorative or Yin yoga?
There’s no strict rule, but one to three sessions a week is a common and sustainable frequency for most people, whether as a standalone practice or alongside more active training. Because both styles are low-impact and low-effort physically, there’s little risk of overdoing it in the way you might with high-intensity exercise — the main limiting factor is usually time rather than recovery.




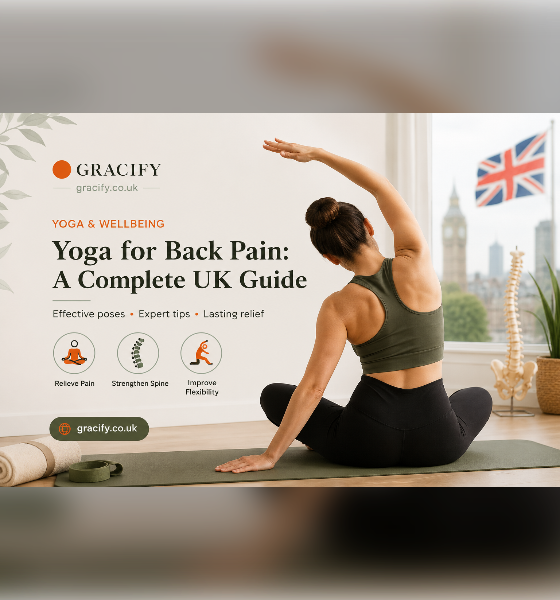
Back pain is one of the most common reasons people try yoga in the first place — and one of the most common reasons they give up on it too quickly, usually because they start with the wrong poses or push through pain that should have been a signal to stop. If you’re dealing with a stiff lower back after a desk-bound week, a nagging ache between your shoulder blades, or something more chronic that’s been with you for months, yoga can genuinely help — but only when it’s approached with some care and a realistic understanding of what it can and can’t do.
This guide walks through what the evidence actually says about yoga and back pain, which poses tend to help (and which ones to avoid depending on your specific issue), how to build a safe home practice, and when back pain is a sign you should see a doctor or physiotherapist rather than unroll a mat.
What the Evidence Actually Says About Yoga and Back Pain
Yoga isn’t a miracle cure, and any article that tells you otherwise is overselling it. But the research base here is genuinely stronger than for most “alternative” approaches to back pain. The UK’s National Institute for Health and Care Excellence (NICE) includes group exercise programmes — and yoga specifically has been studied as one — among the first-line recommendations for persistent low back pain, alongside general physical activity and, where needed, manual therapy or psychological support for chronic cases.
Multiple clinical trials, including a well-known one published in the Annals of Internal Medicine, found that a 12-week course of yoga classes produced improvements in back function comparable to conventional stretching exercises and physiotherapy — meaningfully better than usual care alone, but not dramatically better than other structured movement. In plain terms: yoga works about as well as other well-designed exercise programmes, and it works because it’s exercise that improves strength, flexibility, and body awareness — not because of anything mystical happening on the mat.
The mechanism is fairly well understood. Chronic low back pain is very often linked to a combination of weak deep core and gluteal muscles, tight hip flexors and hamstrings, and poor movement patterns that load the spine unevenly — think prolonged sitting, inconsistent posture, or simply not moving enough during the day. A well-sequenced yoga practice addresses several of these at once: it builds core and back strength gradually, improves hip and hamstring flexibility, and — perhaps most usefully — teaches you to notice tension and poor alignment before it becomes painful.
Which Type of Back Pain You Have Matters
“Back pain” isn’t one thing, and the right approach differs depending on what’s actually going on. Broadly:
Mechanical or postural low back pain — the kind that flares up after long sitting, poor lifting technique, or general deconditioning — tends to respond well to yoga’s combination of strengthening and stretching. This is the most common type and the one most of this guide is aimed at.
Sciatica or nerve-related pain — pain that radiates down one leg, often with numbness or tingling — needs a more careful approach. Certain forward folds and twists can aggravate a compressed nerve root, so gentler, extension-based movement (and professional guidance) is usually safer than a generic “yoga for back pain” sequence.
Pain following a specific injury (a fall, a car accident, a disc herniation confirmed by imaging) should be assessed by a doctor or physiotherapist before you start any new exercise routine, yoga included.
Pain associated with osteoporosis requires avoiding deep forward folds and aggressive spinal flexion, since these positions increase the risk of compression fractures in a weakened spine.
If you’re not sure which category you fall into, that uncertainty is itself a reason to check with a GP or physiotherapist before working through the poses below — a five-minute conversation can save weeks of setback.
Poses That Genuinely Help Most Types of Back Pain
These are the poses most consistently recommended in the clinical yoga-for-back-pain literature and by physiotherapists who incorporate yoga into rehab programmes. Move into each one slowly, breathe steadily, and never push into sharp or radiating pain — a dull stretch sensation is normal, a sharp pinch is not.
Cat-Cow (Marjaryasana-Bitilasana)
On hands and knees, alternate between arching the spine (cow) and rounding it (cat) in time with your breath. This is often the single most-recommended movement for back pain because it takes the spine through a full, gentle range of motion without any load-bearing risk. Ten slow rounds first thing in the morning is a genuinely useful habit for anyone with a stiff lower back.
Child’s Pose (Balasana)
Kneeling with hips back toward the heels and arms extended forward, this pose gently stretches the lower back and can relieve tension between the shoulder blades. If your knees or hips are tight, place a cushion between your calves and thighs to reduce the stretch intensity.
Sphinx Pose (Salamba Bhujangasana)
Lying on your front and propping up onto your forearms, this is a gentle backbend that strengthens the muscles supporting the spine without the intensity of a full cobra pose. It’s particularly useful for people who sit for long periods, since it counteracts the forward-flexed posture of desk work.
Bird Dog (Table Balance)
From hands and knees, extend the opposite arm and leg while keeping the hips level and the core engaged. This is less a stretch than a strengthening exercise, and it directly targets the deep stabilising muscles — the transverse abdominis and multifidus — that are consistently found to be weaker in people with chronic low back pain.
Supine Twist (Supta Matsyendrasana)
Lying on your back, drop both knees to one side while keeping shoulders grounded. This gently mobilises the spine and can relieve tightness in the lower back and hips. Keep the twist gentle — this is not a pose to force.
Bridge Pose (Setu Bandhasana)
Lying on your back with knees bent and feet flat, lift the hips while pressing through the feet. This strengthens the glutes and hamstrings, which take pressure off the lower back when they’re doing their share of the work in daily movement like standing and walking.
Legs-Up-the-Wall (Viparita Karani)
A fully passive pose — lying on your back with legs resting up a wall — that’s less about the back directly and more about giving your whole nervous system a chance to downshift out of the tension that often accompanies chronic pain. Ten minutes here at the end of a session, or on its own on a bad day, is genuinely restorative.
Poses to Approach with Caution or Avoid
Some commonly taught yoga poses can aggravate back pain, particularly for beginners or people with disc-related issues:
Deep forward folds (like a full standing forward bend with rounded spine) can increase pressure on lumbar discs, especially if hamstrings are tight and the movement pulls from the lower back rather than the hips.
Full wheel pose and other deep backbends place significant compressive load on the lower back and shouldn’t be attempted by beginners or anyone with acute pain.
Deep, fast twists — especially in a warmed-up “flow” class where you’re moving quickly — can aggravate disc or nerve-related pain if done without control.
Any pose your teacher or an app pushes you into that causes sharp, radiating, or worsening pain should be skipped regardless of how “beginner-friendly” it’s labelled. Pain that shoots down a leg, causes numbness, or gets noticeably worse during or after practice is your body telling you to stop and get it checked, not push through.
Building a Safe Home Practice
You don’t need an hour-long class to get meaningful benefit. Consistency matters far more than duration for back pain specifically — a focused 15-20 minute routine, done most days, will outperform an occasional 90-minute class.
A sensible structure: start with 2-3 minutes of Cat-Cow to warm the spine, move through Sphinx and Bird Dog for gentle strengthening, add a Supine Twist and Bridge Pose, and finish with a few minutes in Legs-Up-the-Wall or Child’s Pose to let everything settle. Keep movements slow and controlled — back pain rehab is not the place for fast-paced flow sequences, especially early on.
A firm, supportive mat matters more here than in most other styles of practice, since several of these poses involve kneeling or lying with direct spinal contact with the floor. If your existing mat is thin, a folded blanket underneath your knees and lower back during floor poses makes a real difference to comfort and, by extension, to how consistently you’ll actually do the routine.
Props and Equipment That Make Back-Pain Yoga Easier
A few inexpensive props remove a lot of the friction that stops people with back pain from sticking with a practice. A pair of yoga blocks brings the floor up to meet you in poses like a supported forward fold, reducing strain on tight hamstrings that would otherwise pull on the lower back. Alternatively, a bolster or a firmly rolled blanket under the knees during Bridge Pose or under the chest during Sphinx makes both poses considerably more comfortable for anyone with sensitive knees or a stiff thoracic spine.
Likewise, a folded blanket under the hips during seated poses tilts the pelvis forward slightly, which for many people with lower back tightness immediately reduces strain. None of this is essential — you can do a perfectly good back-pain routine with nothing but a mat — but for anyone finding certain poses uncomfortable rather than simply challenging, props are usually the fix, not a sign the pose is wrong for you.
Mat thickness is also worth a specific mention here, since so much of a back-pain practice happens on the floor. A very thin mat (3mm or less) can make kneeling and lying poses genuinely painful on a hard floor, which discourages consistency more than almost anything else. Something in the 5-6mm range, or a thin mat doubled up with a folded towel under the knees and lower back, tends to be the more comfortable choice for this specific use case, even though a thicker mat is sometimes discouraged for balance-focused styles.
A Simple Four-Week Progression
Rather than attempting a long, ambitious sequence from day one, a gradual build tends to produce better adherence and fewer setbacks. In week one, keep sessions to around ten minutes: Cat-Cow, Child’s Pose, and Legs-Up-the-Wall, done daily if possible, simply to get the spine moving gently and build the habit. During week two, add Sphinx Pose and a gentle Supine Twist, extending sessions to roughly fifteen minutes. By the third week, introduce Bird Dog and Bridge Pose to start building strength alongside the mobility work from the first two weeks, bringing total practice time to around twenty minutes. By week four, most people can hold a full routine combining all seven poses from this guide, moving slowly between them with a few breaths in each position, for a session of twenty to twenty-five minutes.
Throughout this progression, the guiding rule is simple: if a pose consistently leaves you feeling worse rather than looser the following day, drop back a stage and give your body more time before reintroducing it. Progress in back-pain rehabilitation is rarely linear, and a setback after a good week doesn’t mean the approach isn’t working — it usually just means the pace needs adjusting.
Common Mistakes That Undermine a Back-Pain Yoga Practice
A handful of habits show up again and again in people who try yoga for back pain and don’t get the results they hoped for. The first is treating a general “power yoga” or fast-paced vinyasa class as interchangeable with a back-care routine. Studio flow classes are built for fitness and flexibility in a general population, not for someone actively managing pain, and pushing through unfamiliar poses at speed is a common way people with back issues get hurt trying to get better. The second is chasing flexibility over stability: spending all your time on deep stretches while skipping strengthening poses like Bird Dog leaves the muscles that support the spine underdeveloped, which does little for pain that stems from weakness rather than tightness.
The third is inconsistency — an intense session once a week doesn’t give the nervous system and tissues the steady, repeated input that seems to matter most for pain reduction, so a shorter routine most days works better. And the fourth, already mentioned but worth repeating, is ignoring pain signals in the name of “pushing through” — a habit that works against you here far more than it helps.
When to See a Doctor Instead of (or Alongside) Trying Yoga
Yoga is a reasonable first step for ordinary mechanical back pain, but it isn’t a substitute for medical assessment in several situations. See a GP or physiotherapist, rather than starting or continuing a yoga routine on your own, if you have: pain that radiates down one or both legs, especially with numbness, tingling, or weakness; back pain following a fall, accident, or other specific injury; pain that wakes you at night or doesn’t ease with rest; unexplained weight loss alongside back pain; or loss of bladder or bowel control (this needs emergency care, not a yoga class).
A known diagnosis of osteoporosis, spinal stenosis, or a herniated disc means certain movements need to be avoided entirely, and pain that has persisted or worsened over more than a few weeks despite gentle movement and rest also warrants medical review. None of this means yoga is off the table — many physiotherapists specifically prescribe modified yoga-based exercises as part of rehab — but it means the sequence and poses should be chosen with professional input rather than a generic online guide.
Frequently Asked Questions
Is it safe to do yoga every day if I have back pain?
For gentle, well-chosen poses like the ones above, daily practice is generally safe and often more effective than occasional longer sessions, since consistency helps build the strength and mobility that prevent flare-ups. The exception is if a session leaves you more sore the next day rather than looser — that’s a sign to scale back intensity or frequency and check in with a physiotherapist.
Can yoga make back pain worse?
Yes, if the poses are wrong for your specific issue or done with poor form — this is genuinely common, particularly with fast-paced classes that don’t account for individual injuries. Sciatica, disc herniations, and osteoporosis in particular require modified approaches. Starting slow, choosing gentle poses like the ones in this guide, and stopping at the first sign of sharp or radiating pain minimises this risk considerably.
How long before yoga helps with chronic back pain?
Clinical trials generally measured outcomes over 12 weeks of consistent practice, with many participants noticing some improvement in function and pain within 6-8 weeks. That said, chronic pain is individual, and a lack of quick results isn’t a reason to assume it won’t work — nor is it a reason to push harder than is comfortable in the meantime.
Does yoga help with back pain, or is regular stretching just as good?
The honest answer, based on the trial evidence, is that yoga performs about as well as other structured stretching and strengthening programmes for most mechanical back pain — the value of yoga specifically is that it packages mobility, strength, and breath-based relaxation into one consistent habit, which for many people is easier to stick with than a generic gym-based exercise sheet. If you already have a stretching or physiotherapy routine you enjoy and follow consistently, there’s no strong evidence that switching to yoga specifically will outperform it.
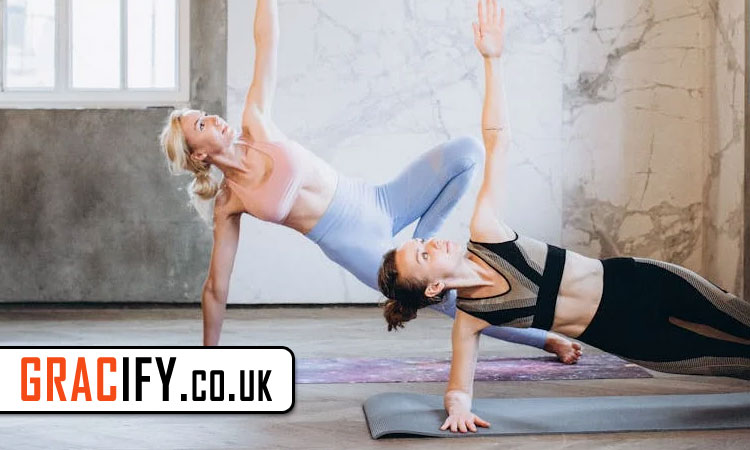
Comparison between Hatha yoga vs Vinyasa yoga: Yoga has become a part of our lives due to its large number of health benefits. It has introduced many techniques that are considered the foundation for various fitness strategies. Experts and yoga teachers have introduced several ways and styles in which yoga can be practiced.
Hatha yoga and Vinyasa yoga are some of those styles which people usually prefer. The origin of both styles is very much similar to each other but still, they differ significantly in many ways. We will discuss some distinct points between these styles and also help you in choosing a better style for practice.
What is Vinyasa Yoga or Vinyasa Flow Yoga?
A most common yoga style that focuses on controlling your body’s movement and breath. It can help you to create a smooth and continuous flow while posing. Therefore, it may also be referred to as flow yoga, which is suitable for both beginners as well as experts.
Key Features of Vinyasa Yoga:
• Coordinating Movements:
Vinyasa Yoga consists of inhale or exhale movements that create a meditative flow.
• Transitional Poses:
This form of yoga helps you to practice transitional and creative poses with more ease and smoothness.
• Energizing:
It provides energy by keeping your body more active due to the smooth flow of poses.
Vinyasa Yoga Poses
Vinyasa yoga poses includes many useful positions such as;
• WarriorII or Virabhadrasana II
• Facing Dog or Adho Mukha Svanasana
• Four Limbed Staff Pose or Chaturanga Dandasana
• Plank Pose or Phalakasana
• Triangle Pose or Trikonasana
• Chair Pose or Utkatasana
• Children Like Pose or Balasana
• Upward Facing Dog Movement or Urdhva Mukha Svnasana
Vinyasa Yoga or Vinyasa Flow Yoga Benefits
We can get a number of physical as well as spiritual benefits by adding Vinyasa yoga in our daily lives. Some of the Vinyasa yoga benefits are given below:
Heart Health:
It can help you to maintain your heart health by practicing its smooth poses regularly.
Stress management:
It helps in different ways such as reducing stress and anxiety through inhale and exhale movements. Thus, it helps to maintain a peaceful state of mind.
Flexibility:
It also enhances strength and flexibility of your muscles.
Weight management:
You can burn a heavy amount of calories and can easily maintain your body’s weight.
Let’s move to our next yoga pose in our comparison Hatha yoga vs Vinyasa yoga.
What is Hatha Yoga?
It is a classic type of yoga which gives birth to many modern yoga techniques and practices. Actually the term “hatha” is used to describe a form of yoga with slower movements and focuses on creating a balance between poses and breath.
Key Features of Hatha Yoga:
Basic Practice:
It is a type of yoga that describes the basic fundamentals of yoga techniques.
Slower movements:
It involves slow movement poses with a deep focus on breath control.
Beneficial:
It is an easy yoga form which is useful and convenient for beginners as well experts.
Hatha Yoga Poses
Basic Hatha yoga poses may include:
• Mountain like Pose or Tadasana
• Tree like Pose or Vrikshasana
• Cat and Cow Pose or Marjaryasana-Bitilasana
• Cobra Position or Bhujangasana
• Seated Forward Bend or Paschimottanasana
• Bridge like Pose or Setu Bandhasana
• Corpse like Pose or Savasana
Hatha Yoga Benefits
Some key benefits of hatha yoga may include:
Flexibility:
Such type of yoga can help you a lot in making your muscles more flexible and stretchable.
Improves Lungs Functionality:
Deep control of breathing can be helpful in improving your respiratory health.
Reduce Stress:
The deep and calm practice reduces stress and anxiety levels.
Increased Strength:
Its poses are very essential for increasing strength in the human body.
Which Should Beginners Choose: Hatha or Vinyasa?
If you’re completely new to yoga, Hatha is generally the easier starting point. Poses are held longer, with more time to check your alignment, and classes move at a slower pace. Vinyasa’s continuous, flowing sequences can be a better fit once you’re comfortable with the basic poses and want a more cardio-focused, dynamic session. If you have a joint injury, balance issues, or are returning to exercise after a break, Hatha’s slower pace and static holds are usually the safer choice. A physiotherapist or your GP can advise if you have a specific injury or condition to work around.
Many UK studios and online platforms label classes “Hatha”, “Vinyasa Flow”, or “Vinyasa Yoga”. Checking the class description for pace and intensity before booking is more reliable than the label alone, since teaching styles vary between studios.
Frequently Asked Questions
Is Hatha or Vinyasa better for weight loss?
Vinyasa’s continuous movement typically burns more calories per session due to its faster pace. But Hatha still offers strength and flexibility benefits — consistency matters more than the specific style you choose.
Can I switch between Hatha and Vinyasa yoga?
Yes, many practitioners combine both — using Hatha for slower, alignment-focused sessions and Vinyasa for more dynamic, cardio-style practice.
Is Hatha yoga safe if I have an injury?
Hatha’s slower pace generally makes it easier to work around injuries. That said, always check with a physiotherapist or your GP before starting if you have a specific condition, and let your teacher know before class.
Conclusion
To conclude we can say that both these types of yoga have their own benefits. Although both are helpful for you to promote your mental and physical health. We have described Hatha yoga vs Vinyasa yoga in detail above. Read through it carefully, and you’ll be able to choose whichever suits your requirements.
Related Reading

The concept of Yoga has evolved traditionally and has become a global phenomenon so, it is most difficult to choose the best Online yoga teacher training course. It keeps on embracing physical as well as spiritual well-being. With the growth of this phenomenon, the demand for choosing a certified yoga instructor increases.
Because of the increasing demand, people started picking it as a profession and taking an interest in how one can become a certified teacher. Online yoga teacher training courses are very popular these days. It allows yoga enthusiasts to pursue their passion online worldwide.
This article guides the criteria for choosing yoga teacher training courses online. We will also explore that what are the most popular yoga teacher training courses online. Some of the courses may include a 200-hour or a 300-hour online yoga training session. This article will also highlight the essential details regarding these courses.
Rise of Online Yoga Teacher Training Courses
Online yoga teacher training courses are considered very convenient for persons who are involved in juggling work. These programs are designed to provide in depth yoga education to persons who do not have the time to attend traditional courses. Such programs cover all the essentials of yoga such as the history and philosophy of yoga, its anatomy, teaching methodology, and practice.
Students can learn all minor details under the supervision of yoga experts through high-quality platforms and interactive live sessions. It is the best way to connect with expert instructors and fellow trainees globally.
These programs are considered an opportunity for aspiring instructors to learn and grow. Yoga Alliance also provides online certifications for these programs.
Criteria to Choose Online Yoga Teacher Training Courses
Let’s discuss the requirements for choosing the right online yoga teacher training course. A large number of options are available for you in this regard. Here are some key requirements to consider while choosing a yoga training session, which are as follows:
Yoga Alliance Certification
Before choosing a course, must ensure that the course is certified by Yoga Alliance. The certification must be recognized globally. As it will provide credibility and opens up many teaching opportunities for you.
Qualified Instructors
Must try to learn under the supervision of qualified and experienced yoga instructors. Do research on the necessary qualifications and experience of yoga instructors. Your instructors must have deep knowledge of the practice and philosophy of yoga.
Course Content
Make an effective strategy and evaluate the syllabus to be more focused on your goals. Most of the online yoga teacher training courses cover:
- History and philosophy of yoga
- Human body structure and anatomy
- Teaching techniques
- Class arrangements
- Yoga Practice
Flexibility and Accessibility
Online courses usually offer flexible schedules to make yoga learning more convenient. It is crucial to check if the course offers flexible learning schedules so that you can manage your time easily during your busy life routines.
Community Support
Online yoga learning courses are the best way to connect with the community. As these programs involve peer interactions and group discussions which are essential for enhancing your learning experience.
Best Yoga Teacher Training Courses in the World
200 Hours Yoga Teacher Training Yoga Alliance
A 200 Hours Yoga Teacher Training Yoga Alliance course is one of the best yoga learning programs. It provides a framework to learn the basic yoga principles and practices.
Key Features of the 200 Hour Session:
Comprehensive Curriculum:
The program aims to provide essential details regarding the basic principles of asana practice and meditation.
Eligibility to Teach:
The course allows you to be considered as a certified/registered yoga instructor after registering with Yoga Alliance.
Duration:
The training usually takes 8–12 weeks including learning and practice.
300 Hours Yoga Teacher Training Yoga Alliance
A 300 Hours Yoga Teacher Training Yoga Alliance is an advanced level course that provides you with knowledge and understanding of yoga.
Key Features of the 300 Hour Program:
Specific Styles:
It also includes learning different teaching styles such as Yin Yoga etc.
Deep Knowledge:
It offers advanced knowledge of Asana, practicing yoga therapy and a deep understanding of anatomy.
Duration:
It usually takes 12–16 weeks to complete.
Benefits of Online Yoga Teacher Training Courses
Online yoga teacher training courses offer several advantages:
Learn Globally:
You can learn from expert instructors with the help of these courses without any kind of geographical limitations.
Less Cost:
Online courses are cost-effective as there are no travel expenses. Therefore, you can save time and money.
Flexible Schedule:
Online courses allow you to learn yoga on your terms without disturbing your work schedules.
Community interactions:
These courses help you to interact with other aspirants through live sessions and discussions.
Is Online Yoga Teacher Training Recognised in the UK?
If you plan to teach in the UK, check that any online course you choose carries genuine Yoga Alliance (or Yoga Alliance Professionals) accreditation, since UK studios, gyms, and insurers will typically ask for this before offering you work or public liability insurance. A 200-hour online course in the UK typically costs between £800 and £1,800, while a 300-hour advanced course tends to range from £1,200 to £2,500, though prices vary by provider and whether live mentoring or in-person practicum days are included.
Also check whether the course includes any assessed practical teaching hours, since a purely video-based course with no live feedback can leave gaps in your ability to safely cue and adjust students in person, something UK employers and insurers increasingly ask about at interview.
Frequently Asked Questions
Is an online yoga teacher training certificate valid in the UK?
Yes, as long as the course is accredited by a recognised body such as Yoga Alliance or Yoga Alliance Professionals. Always check accreditation before enrolling if you intend to teach professionally in the UK.
How much does online yoga teacher training cost in the UK?
Expect to pay roughly £800–£1,800 for a 200-hour course and £1,200–£2,500 for a 300-hour course, depending on the provider and whether live mentoring is included.
Can I get insured to teach yoga after an online-only course?
Most UK insurers require proof of accredited certification, and some also want evidence of assessed practical teaching experience, so check with providers like Balens or Yoga Alliance Professionals before you enrol.
Conclusion
Your online yoga teacher training journey can help you to learn a lot about yoga skills. You can easily choose a program as per your interest and can achieve your goals and aspirations. You can learn from a basic yoga teacher course to an advanced level course under the supervision of next-level instructors. These courses not only provide deep guidance but also enhance your personal growth.
Please share your views in our comments section regarding the online yoga teacher training course uk.
Related Reading

Restorative Yoga vs Yin Yoga: Which is Right for You?

Yoga for Back Pain: A Complete UK Guide

Is the daily screen time healthy for kids?

How to Deal with Continues Child’s demand for Gadgets?

How Old Parents Keep the Kids Engaged in Activities?

Hatha Yoga vs Vinyasa Yoga

Online Yoga Teacher Training Course

Why is Kundalini Yoga dangerous?

High Rise Yoga Leggings for Women

Best Travel Yoga Mat UK
Natural Rubber vs Cork Yoga Mat – which is Better?

TPE vs EVA Yoga Mat & NBR vs PVC Yoga Mat
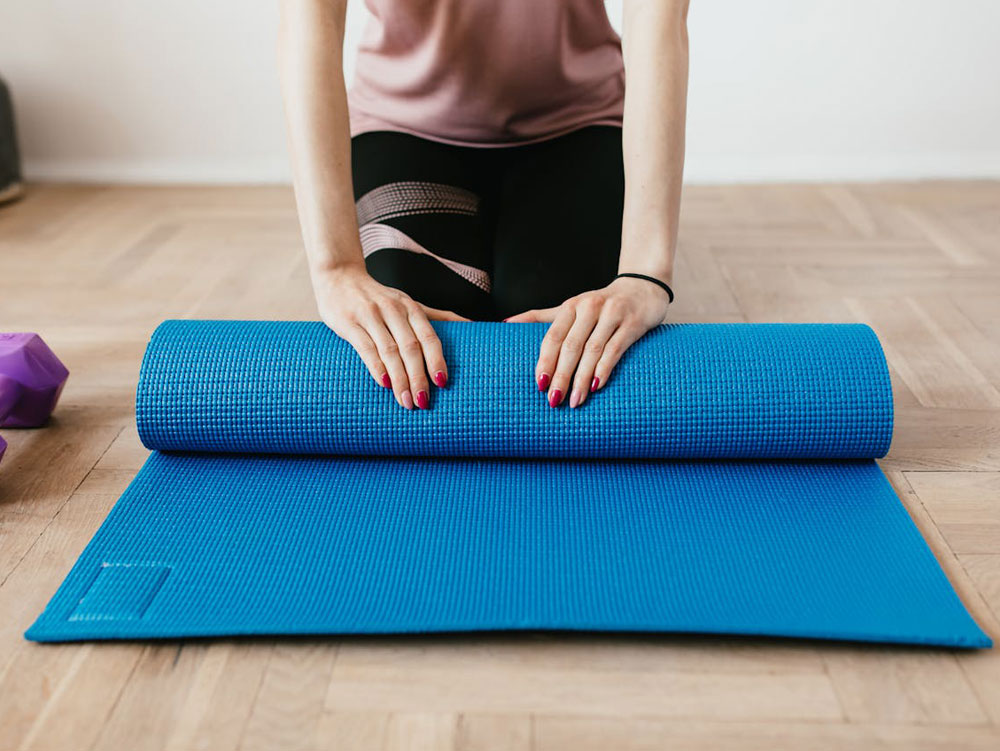
How to Roll Up a Yoga Mat? For Long Lasting
Pilates Mat vs Yoga Mat
Which is the Best Yoga Mat Thickness?
Which Material is Best for Yoga Mat
How to Clean / Wash Yoga Mat

How to Become a Yoga Instructor UK
Which is the Best Yoga Mat Size?

What is the difference between Yoga Leggings and Running Leggings
-
Yoga2 years ago
Natural Rubber vs Cork Yoga Mat – which is Better?
-
 Yoga2 years ago
TPE vs EVA Yoga Mat & NBR vs PVC Yoga Mat
-
Yoga2 years ago
How to Roll Up a Yoga Mat? For Long Lasting
-
Yoga2 years ago
Pilates Mat vs Yoga Mat
-
Yoga2 years ago
Which is the Best Yoga Mat Thickness?
-
Yoga2 years ago
Which Material is Best for Yoga Mat
-
Yoga2 years ago
How to Clean / Wash Yoga Mat
-
 Yoga2 years ago
How to Become a Yoga Instructor UK
Natural Rubber vs Cork Yoga Mat – which is Better?
TPE vs EVA Yoga Mat & NBR vs PVC Yoga Mat
How to Roll Up a Yoga Mat? For Long Lasting
Pilates Mat vs Yoga Mat
Which is the Best Yoga Mat Thickness?
Which Material is Best for Yoga Mat
How to Clean / Wash Yoga Mat
How to Become a Yoga Instructor UK